This step by step diy woodworking project is about free rabbit hutch plans. The project features instructions for building a 3×4 rabbit hutch with a spacious run attached. If you are looking for detailed plans for a sturdy rabbit hutch with easy to access doors, chances are you came to the right place. Make sure you take a look over the rest of plans to see alternatives and more projects for your garden.
When buying the lumber, you should select the planks with great care, making sure they are straight and without any visible flaws (cracks, knots, twists, decay). Investing in cedar or other weather resistant lumber is a good idea, as it will pay off on the long run. Use a spirit level to plumb and align the components, before inserting the galvanized screws, otherwise the project won’t have a symmetrical look. If you have all the materials and tools required for the project, you could get the job done in about a day.
Projects made from these plans
It’s that easy to build a rabbit hutch!
Building a rabbit hutch
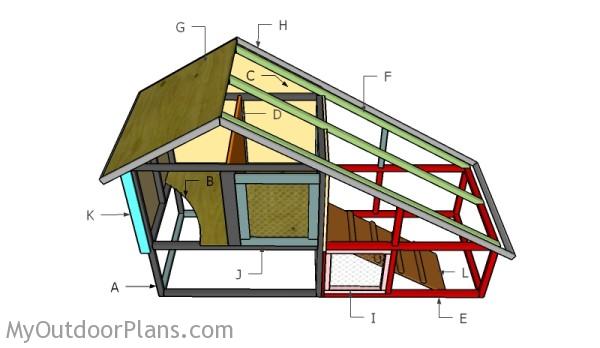
Free Rabbit Hutch Plans

The first step of the project is to frame the back wall of the rabbit hutch. Cut the components from 2×2 lumber at the right dimensions. Drill pilot holes through the components and insert 2 1/2″ screws. Align the edges and make sure the corners are square. Alternatively, you can drill pocket holes and inset 2 1/2″ screws.
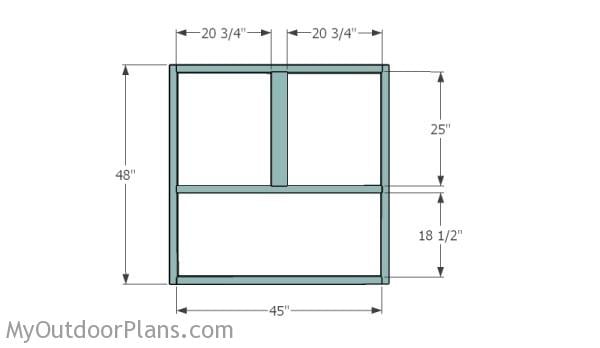
Build the front wall in the same manner. However, you need to fit a 2×4 support to the middle of the frame. Drill pilot holes and use 2 1/2″ screws to create rigid joints. Align the edges with attention for a professional result.

After building the front and back walls, you need to assemble the frame of the rabbit hutch by attaching the side components. Drill pilot holes and fit the supports, as shown in the diagram. Make sure the corners are square and align the edges with attention.
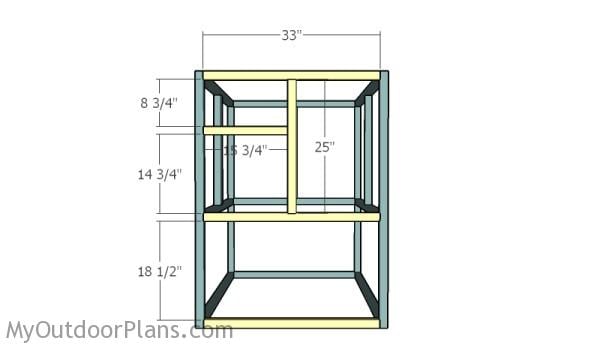
Build the opposite side wall for the rabbit hutch. As you can easily notice, we recommend you to frame an opening for access to the run.
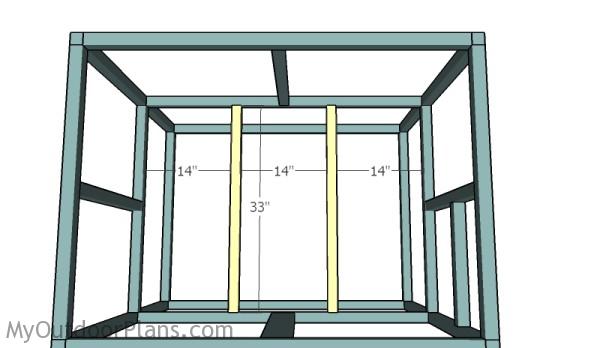
In order to enhance the rigidity of the floor, you have to attach 2×2 supports, as shown in the image. Drill pilot holes through the frame and insert 2 1/2″ screws into the supports. Make sure the corners are square before inserting the screws.
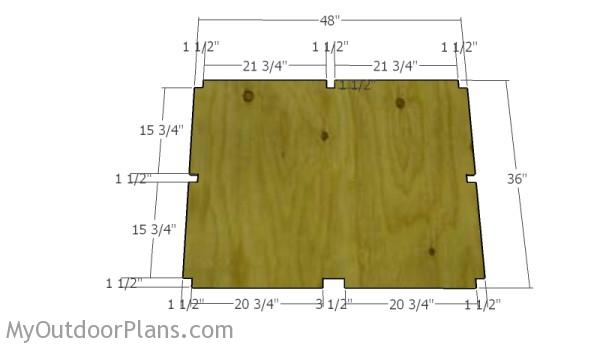
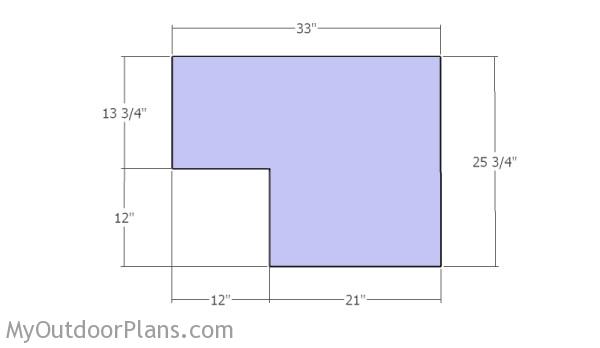
Build the floor from 3/4″ plywood. Mark the cut lines and create the notches using a circular saw. Smooth the edges with sandpaper.
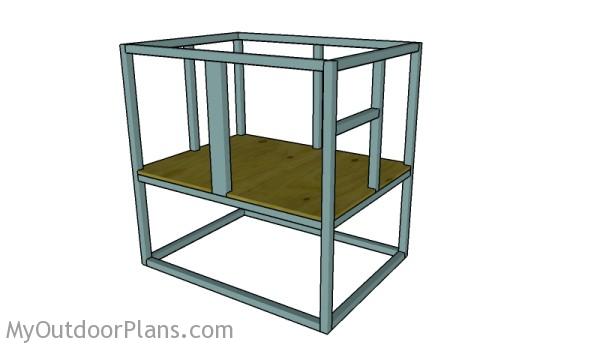
Fit the floor into place and leave no gaps between the components. Use 1 5/8″ screws to lock the sheets to the supports.
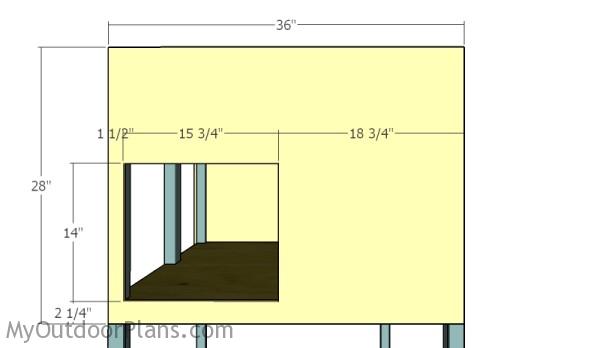
Build the side wall from 3/4″ plywood. Cut out the opening after drilling a starting hole, using a jigsaw. Align the panel to the edges and secure it to the frame using 1 5/8″ screws, every 8″ along the supports.
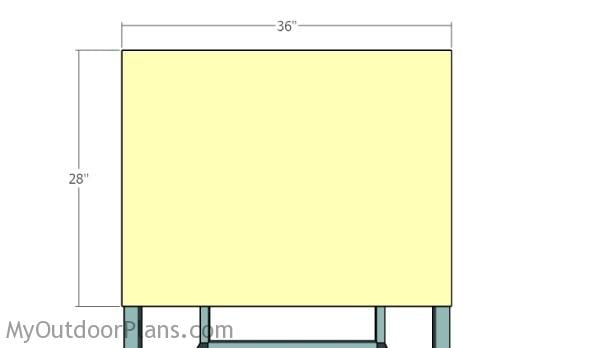
Build the opposite side wall from 3/4″ plywood. Attach the panel to the wall frame and align the components with attention. Use 1 5/8″ screws to secure the sheet into place, every 8″ along the framing.
Build the partition from 3/4″ plywood, using the information from the diagram. Drill pocket holes along the side edges.
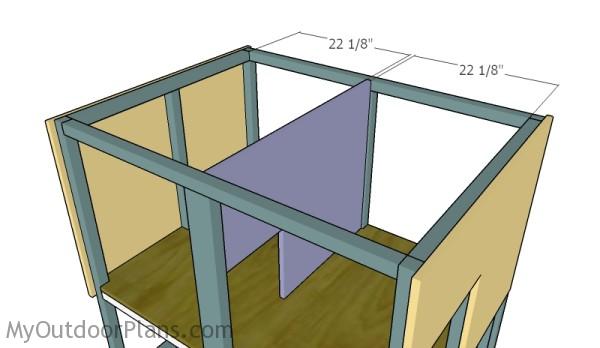
Fit the partition to the frame of the rabbit hutch. Align everything with attention and secure the panel to the studs, using 1 1/4″ screws. Use a spirit level to make sure the panel is plumb.
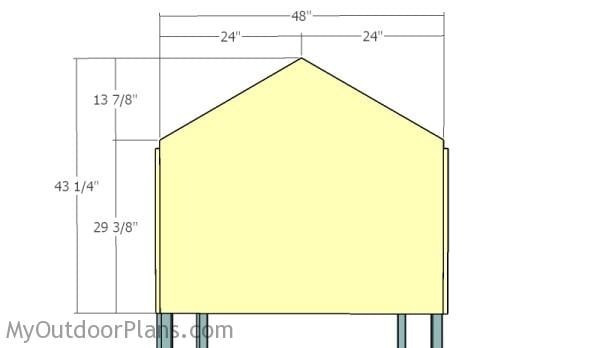
Build the back wall from 3/4″ plywood. Align the edges with attention and secure it to the framing using 1 5/8″ screws.
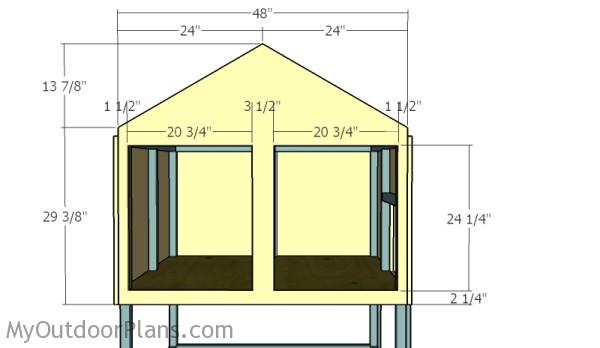
Build the front wall from 3/4″ plywood. Mark the cut lines and get the job done with a circular saw. Create the door openings by using a jigsaw. Smooth the edges with sandpaper. Use 1 5/8″ screws to lock the panel to the wall frame.
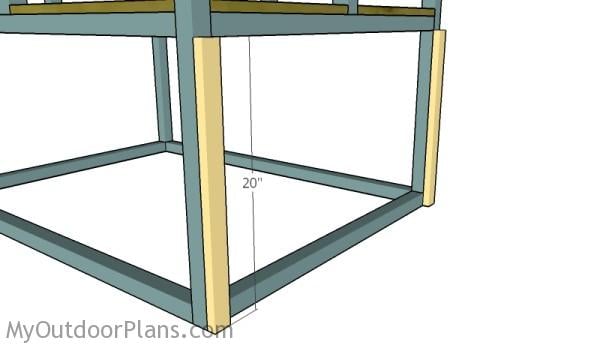
Fit 1×2 trims to the right side of the rabbit hutch. Use 1 5/8″ screws to lock the trims to the vertical supports. Leave no gaps between the components for a professional result.

Next, you need to assemble the run for the rabbit hutch. Cut the components from 2×2 lumber. Drill pilot holes, align the edges and insert 2 1/2″ screws to lock everything together tightly. Make sure the corners are square for a professional result.
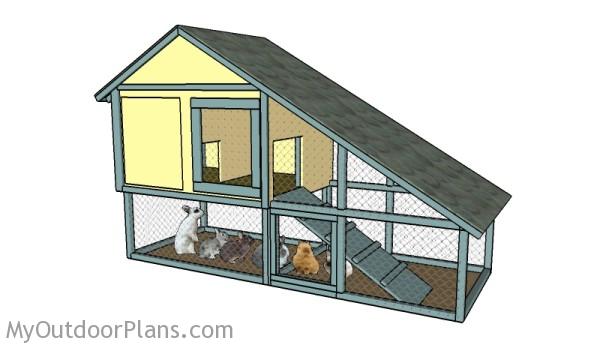
This rabbit hutch has a nice design and it is roomy enough to host your pets. It features a large run and has three access doors.
Top Tip: Make sure you check out the part 2 of this project, to learn more about how to build the roof for the rabbit hutch.
This woodworking project was about free rabbit hutch plans. If you want to see more outdoor plans, check out the rest of our step by step projects and follow the instructions to obtain a professional result.
Original article and pictures take http://myoutdoorplans.com/animals/free-rabbit-hutch-plans/ site
Комментариев нет:
Отправить комментарий